App Designer: Go with the flow
Mapping app controls to data workflow inputs
As you know by now, PMG’s App Designer allows you to easily display real-time information by pulling it in dynamically via a Data Workflow. But what if you want one app control to drive another app control?
This capability significantly expands the use cases for PMG apps, replicating the experience of a coded application interface more than ever.
Once again, the power of PMG’s Data Workflows (a/k/a InProc Workflows) brings new possibilities to citizen developers. By mapping controls like buttons or “form” fields to the input parameters of a Data Workflow, you can drive the options available in another control or question on the app page. And, do it all without code.
Implementing a triggered setup in App Designer is easier than you might think. In the example below, we’ll show you the three quick steps to map the user’s selection of a training session in one control to the Data Workflow that retrieves the training session details for another control to display.
In this case, the “Session Details” section is an HTML widget that needs the user’s selection of which training session they want to see to know which information to show.
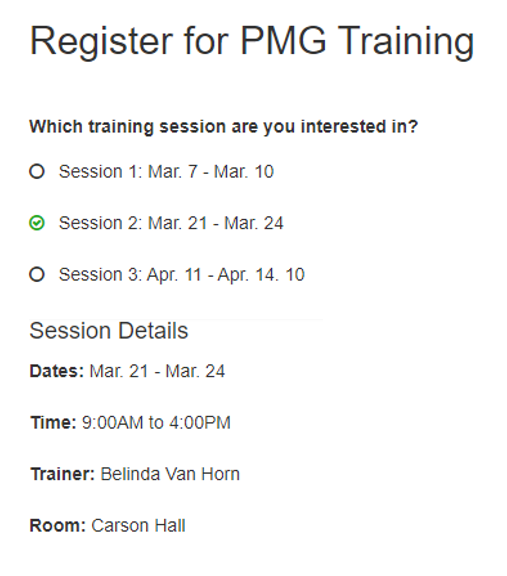
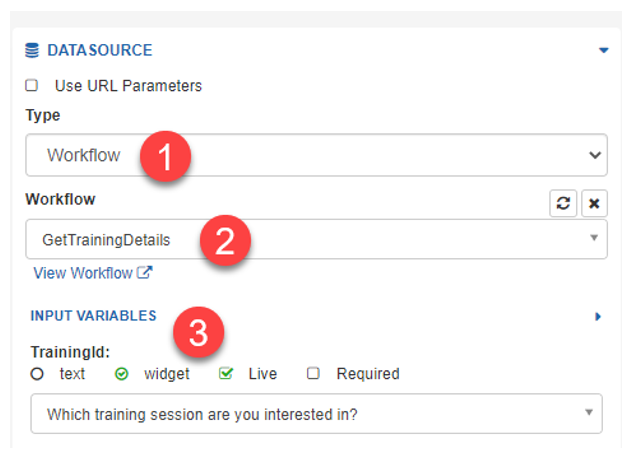
To configure the “Session Details” widget, follow these steps:
- Select the data source of the widget as Workflow.
- Select the specific Data Workflow that will get the Session Details information. The input variables will then be displayed underneath. In our example, TrainingId is the Input Variable required by the workflow.
- Select widget as the input source for the variable, and then map the radio button labeled “Which training session are you interested in?” to the TrainingId input by selecting it from the dropdown list of app fields provided.
By selecting “Live”, the Data Workflow we’ve selected will be set to run when the end user clicks one of the radio buttons on the app page.
Here’s another example. This one is a little more complex.
In this scenario, we have a PMG app with nine different controls – essentially a “form” where someone can enter their details to register for training.
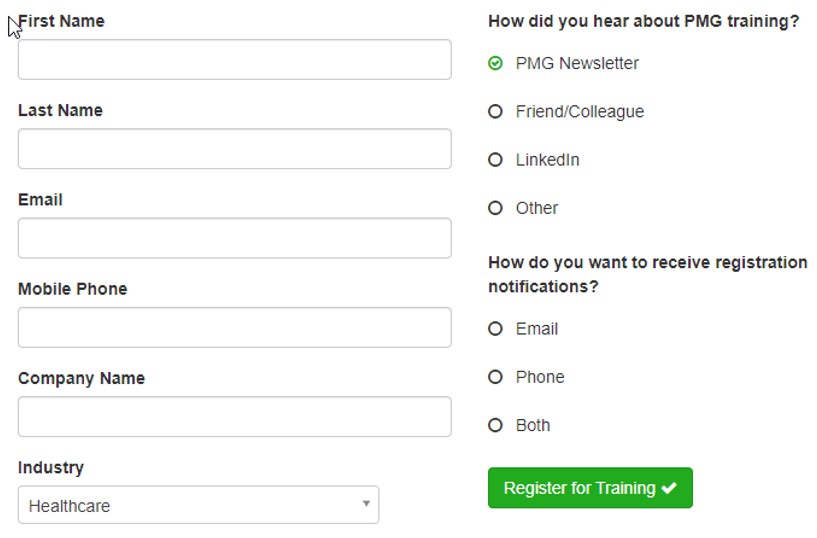
We also have a Data Workflow we’ve called “EnrollTraining” that looks for nine different input variables, one for each piece of registration information. This use case is different because we want to wait until the user has filled out all the registration fields before kicking off the workflow.
So, instead of using the “Live” option on any of the app controls, we’ve added a button control that will submit the data to the workflow all at once, after the user is finished entering their data.
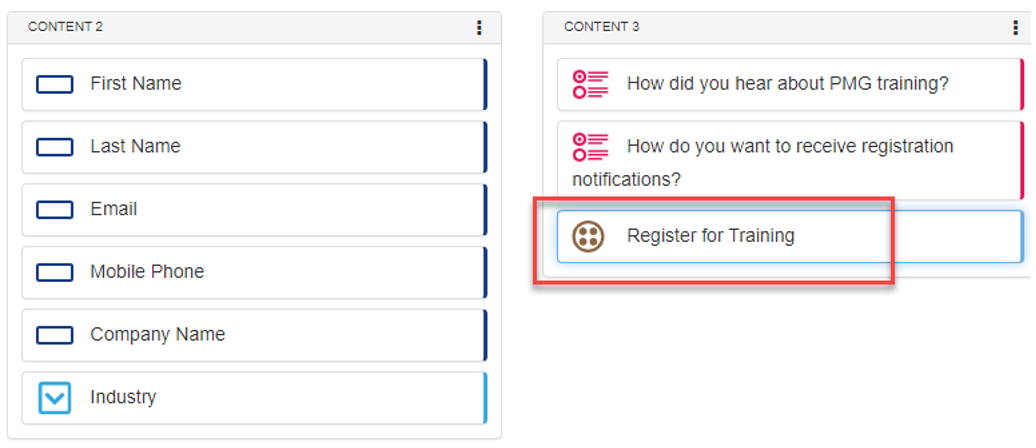
Just as in our first example, each of the workflow’s Input Variables is mapped to a control in the app (in this case, a registration question) by selecting the app control from the select list shown under each workflow input.
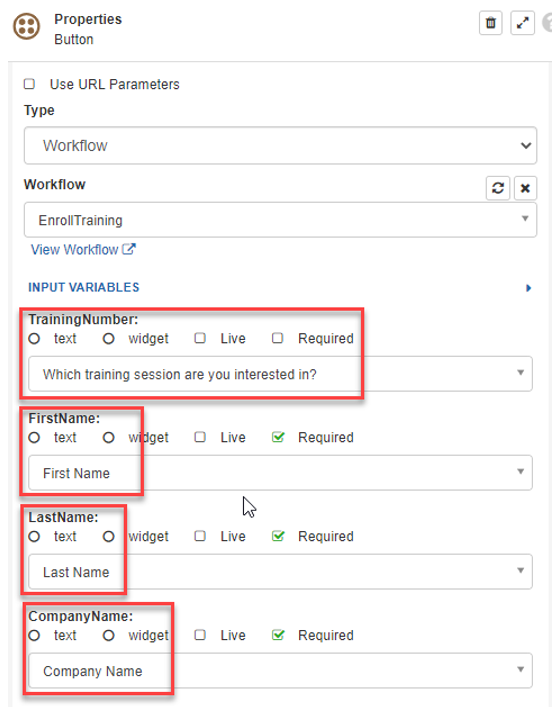
Now the “EnrollTraining” workflow can run its process to get the person registered for training. And from there, you can trigger whatever action or display you want… a pop-up confirmation on the app page, an email confirmation, an update to a Salesforce record, or all three. The sky’s the limit!
